overview
Your Cummins generates codes which are designed to aid you in identifying the problem within your car. With so many codes, figuring out what to do may be difficult if they pop up. P226C seems quite scary, but is it?
P226C Code On 6.7L Cummins is due to the variable geometry turbocharger’s motor not functioning as the powertrain control unit expects. This leads to insufficient or overflowing air in the engine, which causes problems with performance.
Table of Contents
This article will discuss the internal mechanisms of the turbocharger, which can cause dispersion of the positions. It will also advise you on how to fix your Cummins, so it performs normally. If you’re eager to take your baby to enjoy a smooth ride, take a look!
What does the P226C Error Code Means
Consider an error message P226C in this manner: The error code P226C is missing more than the bullseye on a dartboard but also the entire dartboard.
The engine lets you know the distance that an actuator can move from its position ought to be. However, sometimes, it’s placed too far away, which causes the error code P226C.
To figure out how to repair it, it’s important to know how the variable geometry turbocharger functions first.
The Way the Turbocharger Variable Geometry Works
The turbochargers and exhaust turbines majorly function in the vehicle’s operation.
Inside your car’s cylinders, huge volumes and quantities of gasses are absorbed by the manifold for exhaust. They are referred to as exhaust gases.
After being absorbed in the manifold exhaust,aust gasses are pushed to the turbocharger via the exhaust turbine’s intake. The force generated by their movement causes the turbine wheel to move.
In the exhaust manifold, the gases can enter the turbocharger via the inlet for exhaust turbines. The force produced by these gases causes the turbine wheel to rotate. The turbine wheel is part of the turbocharger’s compressor wheel.
That means that whenever one wheel rotates one wheel, the other wheel will also turn. The compressor wheel compresses air and then pushes the compressed air into the Cummins engine.
The way that air is treated has a significant impact on the way your vehicle’s engine functions.
The VGT Needs to Provide the Correct Air Pressure
The quantity of air required to run your engine differs based on the situation and is measured using the ratio A/R.
If the A/R ratio can be high, greater air pressure is put into the engine. More air means improved engine performance. However, this means that the vehicle will not respond instantly when you need to accelerate, or, in other words, the turbo is lagging.
The reverse is true when the ratio of A/R is lower. Automobile manufacturers attempt to balance both using a variable-geometry turbocharger (VGT). This is achieved with an actuator that redirects gases from turbine wheels away.
Where does the issue begin? The Actuator needs to be in a specific place to enable the turbocharger to provide the proper quantity of gasses. Sometimes, it ought to be somewhere else due to mechanical wear.
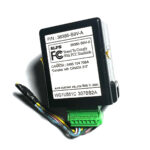
As you might have guessed, the engine is equipped with a “brain” known as”the Powertrain Control Module (PCM), which controls the VGT’s position in the Actuator. The VGT comes with its own sensors that determine the exact location of the Actuator, which it transmits onto the PCM.
For example, let’s say your engine is experiencing performance problems. The PCM is informed that the actual position of the Actuator is not in line with the position commanded by the PCM. This implies that several components inside the engine don’t perform. This is why this P226C error code is generated.
You can also determine whether it’s a VGT issue using the Cummins Malfunction Indicator Light (MIL). The light will flash if the PCM detects the discrepancy within two run-throughs to diagnose. It ceases after the discrepancy has been fixed and is not discovered for four tests.
4 Steps to Repair the P226C Code On 6.7L Cummins
The solution to this issue is much easier than you think, but req requires patience. The fix could be as easy as inspecting the Actuator to identify whether the error code is true or as difficult as a complete overhaul of the Actuator.
Examine for oil in the exhaust Pipes.
The Actuator is situated within the interior of the engine. Accessing it requires taking off covers, for example:
- Fairings found in a few trucks
- Air filter boxes
- Pipes
A pipe is attached to the Actuator as it is the place where exhaust gases flow. If you remove the pipe and observe oil in the pipe, it could be the cause that prevents the Actuator from functioning normally.
Find the Actuator’s fault by taking it Out.
The VGT is connected to the pipe that runs along its upper part. This is known as the cooling line.
To remove the Actuator, Here are the steps to follow.
- The coolant should be drained to ensure that nothing goes through the pipe. When you’re done, take out the pipe.
- An electricity plugin attached clip at the side of the VGT attaches a plug for electricity. The plug ends at an actuator. The clip is pressed and then pulled back to remove the VGT. On the sides are four bolts that need an Allen key to remove.
- The tiger is on the high point of VGT to take off the Actuator. Once it’s removed, you’ll be able to observe the sector gear of the Actuator. It’s triangular, with sharp edges that resemble teeth on its base.
- Pull and push the sector gear side-to-side to check whether it is moving as expected. Also, check if you can detect an oily substance in the gears of the sector. The edges with teeth are more vulnerable to this.
- Also, examine the Actuator itself. It also has teeth-like edges at the point where it meets the gears of the sector. Make sure there is oil. If it is, clean any excess oil off.
- Examine the Operation of the Actuator
Reattach the electrical plug on the Actuator. This lets you observe the operation of the Actuator while you take the vehicle for a spin. It’s not necessary to connect the other connections.
It would help if you had someone watching the upper portion while doing this. If you’re not with anyone, record an image of the Actuator using your phone camera instead.
To determine the operation of the Actuator:
- The key in your car, however, doesn’t begin the engine. The only thing you are doing is granting electricity power to your VGT.
- Have someone else review the footage to determine if an actuator moved when the car was plugged into it. If it didn’t move, that’s a sign it’s in poor condition and should be replaced.
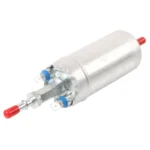
- Replace the Actuator
Replacement actuators are equipped with an ejector pin that removes the original Actuator. Installing it can seem daunting; however, it’s usually quite simple.
Here’s how you can do it:
- The Actuator should be pushed to the left; insert the pin afterwards. Apply your finger pressure on the top of the pin. Drag it slowly towards the left while keeping the pressure.
- When the pin falls, the Actuator will be at the right location to measure.
- Unpin the pin, and make sure you don’t alter the position of the Actuator. The replacements come with gaskets to seal the Actuator, which can be replaced. They might be leaking oil, too.
It is possible to install the new Actuator through the INSITE program in the following manner.
- Select ECM Diagnostic Tests. You’ll be presented with a variety of choices.
- Go to the VGT Electronic Actuator Installation and Calibration.
- Under Inputs, Select the drop-down on the procedure box and then select Install Actuator.
- Open your actuator replacement. Connect the electrical plug, and then use your Allen tool to tighten the bolts holding the Actuator in the position. Make sure to reconnect the coolant pipe. This method works without it.
- In your INSITE, then click to start. It should take an amount of time. If INSITE detects that the Actuator is defective or hasn’t been properly installed, it will tell you it has seen an issue in process status.
Check the calibration of your new Actuator.
The new Actuator must be properly integrated into the engine’s system. This is why a correct calibration is required. Fortunately, software tools can make the process easier and faster.
Here’s how you can do it using INST:
- Reattach to the line of coolant.
- In the drop-down box, choose Calibrate Actuator.
- Attach all the pipes, screws and other automotive parts you’ve removed based on the engine you’re using.
- Plug in your car, and then turn on the engine. The vehicle should be ready to go if you find no errors.
Before you decide to ditch your Cummins entirely, please note that its Powerstroke is equally susceptible to mistakes. Components will likely fail every time because you’re dealing with complicated machines.
Being patient enough to identify or fix the components is a matter of patience.
Conclusion
The Cummins P226C error code is found in an actuator malfunctioning due to mechanical or oil wear. It’s good to know that replacement actuators are easily found, and the replacement process is easy. With just a few minutes and the right equipment, you’ll be back on the road quickly!
If none of these solutions are working, it might be recommended to seek the help of an expert. There could be a second issue that is causing the error message.
Related topics:P2262 code 6.7 Cummins